The Educopia Institute is pleased to announce the launch of the BitCurator Consortium (BCC), a new independent, community-led membership association to support the curation of born-digital materials by libraries, archives, and museums. Members of the BitCurator user community have founded BCC to enhance, promote, and explore this growing area of professional activity.
“Managing born-digital acquisitions is becoming a top concern in research libraries, archives, and museums worldwide,” shares co-founder Dr. Christopher (Cal) Lee. “The BCC now provides a crucial hub where curators can learn from each other, share challenges and successes, and together define and advance technical and administrative workflows for born-digital content.” Co-founder Dr. Matthew Kirschenbaum adds: “Tools without actively invested communities wither on the vine, become dead bits. The BCC is not just an extension of BitCurator, in a very real sense it will now become BitCurator.”
Institutions responsible for the curation of born-digital materials are invited to become members of the BCC. New members will join an active, growing community of practice and gain entry into an international conversation around this emerging set of practices.
Other member benefits include:
• Voting rights
• Eligibility to serve on the BCC Executive Council and Committees
• Professional development and training opportunities
• Subscription to a dedicated BCC member mailing list
• Special registration rates for BCC events
The BCC operates as an affiliated community of the Educopia Institute, a non-profit organization that advances cultural, scientific, and scholarly institutions by catalyzing networks and collaborative communities to facilitate collective impact.
Learn more about BCC and its growing network of libraries, archives, and museums here!
Read/download the official press release here!
Please join us for a gathering of BitCurator users on the evening of August 12th after the SAA Research Forum from 5:30PM to 7:30PM. Come meet other BitCurator users and share your experiences working with digital forensics and BitCurator. In addition to collaborating with other BitCurator users, meet with BitCurator Co-PI’s Cal Lee and Matt Kirschenbaum, and BitCurator Community Lead Porter Olsen. We will discuss the project thus far, recent developments, and BitCurator going forward. Appetizers will be provided, so please come and join us! Email Porter at polsen (at) umd dot edu if you have any questions.
Who: BitCurator users and prospective users
When: The evening of August 12, 2014 from 5:30PM to 7:30PM
Where: The second floor of the Black Squirrel gastropub located at 2427 18th Street NW
Washington, D.C. 20009, a fifteen minute walk from the Washington Marriott Wardman Park hotel where the SAA Annual Conference is being held.
To join us, please fill out the brief form below. We will email attendees with gathering details as we get closer to the event date.
The BitCurator Consortium (BCC) is an independent, community-led membership association that will serve as the host and center of administrative, user and community support for the BitCurator environment. Its purpose is to support curation of born-digital materials through the application of open-source digital forensics tools by institutions responsible for such materials.
The BitCurator project (2011-2014), funded by the Andrew W. Mellon Foundation, has developed, packaged and documented open-source digital forensics tools to allow libraries, archives and museums (LAMs) to extract digital materials from removable media in ways that reflect the metadata and ensure the integrity of the materials, allowing users to make sense of materials and understand their context, and preventing inadvertent disclosure of sensitive data. The BitCurator project has also engaged with interested professionals, through conferences, specialized events, online interactions, and site visits. Together, these tools and relationships provide a strong foundation upon which the BitCurator Consortium now builds.
The Software
The BitCurator software is freely distributed under an open source license. It can be installed as a Linux environment; run as a virtual machine on top of most contemporary operating systems; or run as individual software tools, packages, support scripts, and documentation.
Tools in the BitCurator environment – both those produced by the project team and those from third-party developers – can advance core curation activities, including (but not limited to):
Reduce the risk of inadvertent changes to content through software-based write-blocking
Create authentic copies of content through disk imaging and cryptographic hashing
Mount forensically packaged disk images to view and export their content
Reflect original order of materials through capture of filesystem metadata
Establish trustworthy chains of custody through documentation of curatorial actions (log files, PREMIS records)
Generate reports that characterize the contents of disks and directories
Identify and document duplicate files
Discover and expose associated contextual information
Identify sensitive information that should be filtered, redacted or masked in appropriate ways
Export contents of disks and directories for inclusion in Archival Information Packages and Dissemination Information Packages
Consortium Membership
Institutions responsible for the curation of born-digital materials – especially those held or acquired on digital storage media – are invited to participate in the BitCurator Consortium. Membership is open to institutions in all sectors and all nations. The BCC envisions a robust network of institutions committed to enhancing, promoting, and exploring this growing area of activity.
There are two categories of BCC membership: Charter and General. Charter Members will play an early, active role in the shaping of the BitCurator Consortium’s governance, ongoing development, and overall sustainability. Charter Membership is a one-time membership option, available only through December 31, 2014.
The most important member benefit is assurance that the BitCurator software will persist and evolve in future years. Other membership benefits include:
General Members:
Access to a BCC help desk
Prioritization in future enhancement requests
Dedicated educational offerings
Voting rights
Eligibility to serve on the BCC Executive Council and Committees
Service opportunities
Community engagement and networking
Professional development and training
Subscription to a dedicated BCC member mailing list
Special rates for BCC events, including the annual BitCurator User Forum
Charter Members – all General Member benefits and:
Opportunity to participate in and shape the initial BitCurator Consortium Executive Council and BitCurator Consortium Committees, including exclusive eligibility for election or appointment to the Executive Council during the charter period
Participation in the development of the initial BitCurator Consortium user, technical and service roadmaps.
Recognition through the placement of your institution name, logo and link on the BitCurator Consortium web site.
Use of the “BitCurator Consortium Charter Member” icon
During the Charter period (June-December 2014), members can take advantage of the following rates (subject to potential changes in the future):
Dues for Charter Members in the first year are $5000 (US). After the first year of membership, dues will be the same as those of General Members.
General Member dues are $2000 (US) per institution per year, for a three-year period with annual billing opportunities. Members can pay in full for their three-year period during their first six months of membership to lock in the above rates.
– If you’re interested in joining the BitCurator Consortium, contact Cal Lee – callee {at} ils [dot] unc {dot} edu
– For information about the BitCurator software and user community, visit: bitcurator.net
The BCC is administered by the Educopia Institute, a non-profit that advances cultural, scientific, and scholarly institutions by catalyzing networks and collaborative communities.
[Original post by Amanda Visconti. Minor updates in July 2018 to resolve outdated links and media.]
Last week, I wrote about how to forensically image the internal hard drive on a Mac laptop without needing to physically remove the drive. If your workspace doesn’t have the necessary tools to follow that tutorial (a firewire cable, a firewire port on the Mac you’re imaging, and a firewire port on a PC partitioned with BitCurator), we offer an alternative in this post.
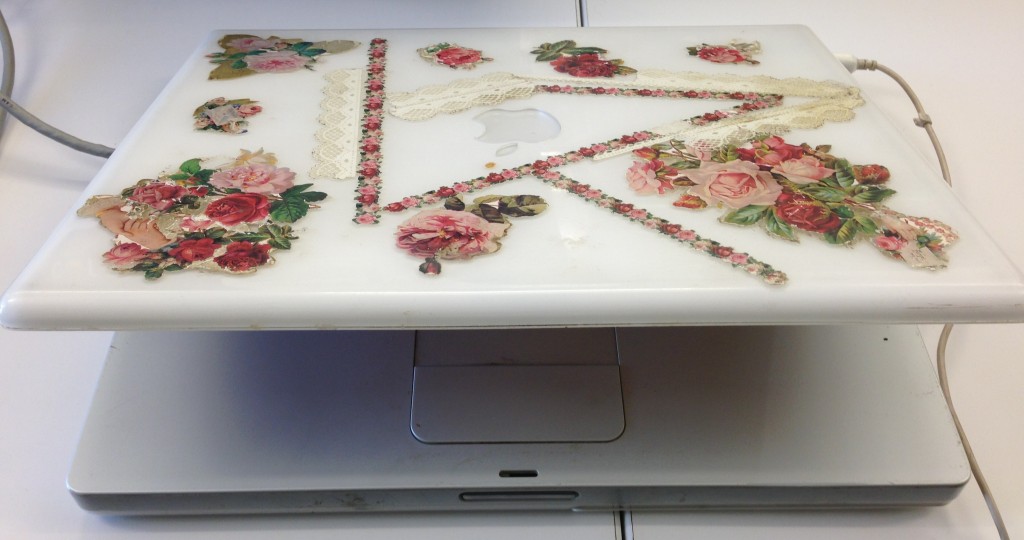
The Mac laptop we wanted to forensically image.
Other Options for Imaging Mac Laptops
We recognize that you might not have the correct devices on hand to follow the instructions in the previous post. In that case, you may want to open the laptop to temporarily remove the hard drive for forensic imaging within the BitCurator environment, which means you’ll need a cable that connects a hard drive to your imaging computer (probably a SATA cable). You can also opt to make a forensics image outside BitCurator and then import the image into BitCurator for exploration.
Note that the issue complicating this imaging process is specific to Mac laptops; Linux and Windows laptops wouldn’t require target disk mode and the trouble that causes. Target disk mode works with other Macs (perhaps obviously) and Linux machines; I wasn’t able to get a Windows machine to recognize the Mac laptop in target disk mode. I’ve read that commercial software called MacDrive (currently about $50 for use on one PC) will let you connect the a Mac in target disk mode to a PC, but this would not make the Mac drive also available in the Windows computer’s BitCurator VM; unfortunately, VirtualBox is unable to take firewire input. It’s possible you could get around this issue by using other virtualization software, but VirtualBox is the best free/open-source option.
That leaves us with using either a Mac or Linux machine to create our backup of the Mac laptop; in our example, I used a Mac to create the backups. We’ll walk you through how to first lessen the risk of tampering with a laptop’s insides by securing a forensic image outside of BitCurator.
Why Backup?
Opening up the laptop, removing the drive, and later trying to put everything back risks the laptop refusing to start or otherwise being damaged: maybe you break something, or can’t get things to fit back together. If you don’t have another way to gather a forensics disk image packaged with metadata about the imaging, though, opening the laptop up can be an acceptable risk. All computers fail eventually, and we’d rather have a good forensics disk image of the laptop now, than more years with the laptop working but no forensics image preserved. We thus recommend you forensically image the laptop’s hard drive before opening it, or choose to create a forensics image with one of the non-BitCurator options discussed below and import the image into BitCurator. Opening up the computer is only necessary if none of these forensics imaging programs are right for you, your Mac laptop doesn’t have a firewire port, or if you prefer to do all your forensic work inside the BitCurator environment. For either method, you’ll need a firewire and another Mac (with a firewire port) on which to image the laptop.
Write Blocking
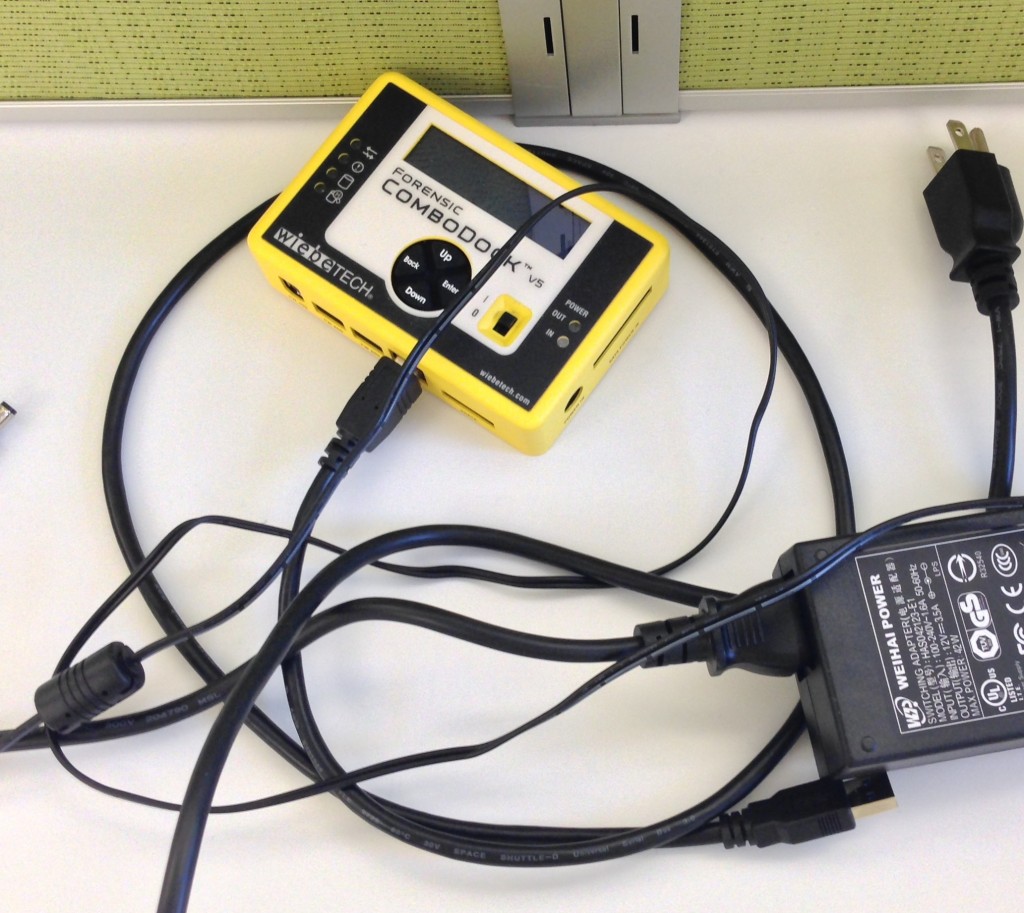
First, we need to protect the laptop from having the connected machine write back to it during the imaging process. This wasn’t a major concern in our example as Larsen’s laptop has already been explored by researchers at MITH—but it’s good practice nonetheless, especially if you use a command-line imaging method, where a simple is-typing could accidentally erase your device. Our WiebeTech Forensic ComboDock works well for most write-blocking purposes, but it doesn’t have the firewire input and output needed to work with a Mac in target disk mode. Tableau T9 Firewire Forensic Bridge is a hardware option that does accept both firewire input and output, but we didn’t have one on hand. We thus used software write-blocking instead, installing Aaron Burghardt’s Disk Arbitrator to protect the laptop.
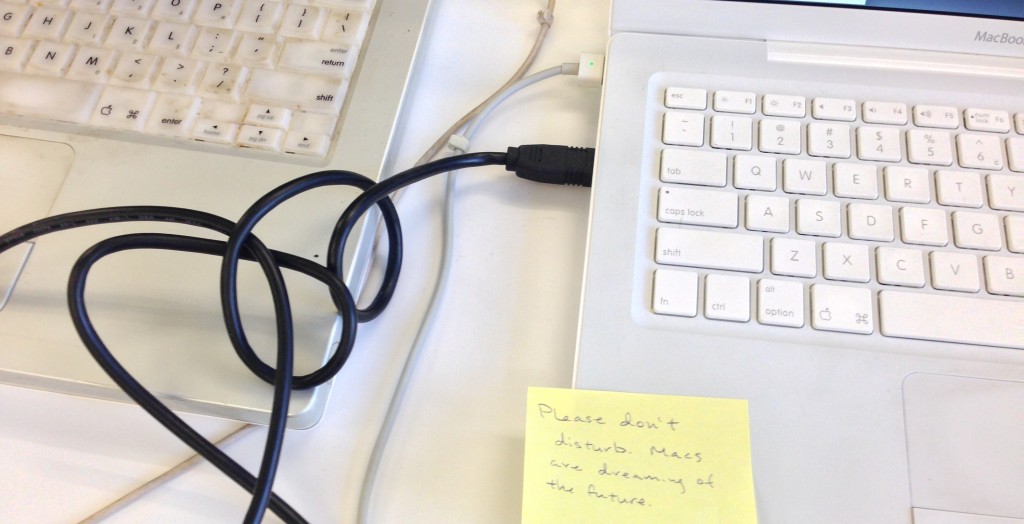
Imaging time! Leaving the computers alone during imaging.
A Forensic Disk Image
Begin by putting the Mac laptop you want to image into target disk mode:
The laptop to be imaged (e.g. our Larsen laptop) should be turned off.
Hold down the t key and turn the laptop to be imaged on.
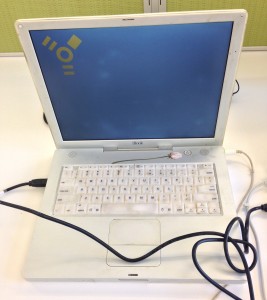
Continue to hold down the t key until the target disk mode image appears on the screen (see photo below).
Mac in target disk mode.
You can now connect your firewire cable to both the laptop to be imaged and the Mac (or Linux computer) doing the imaging.
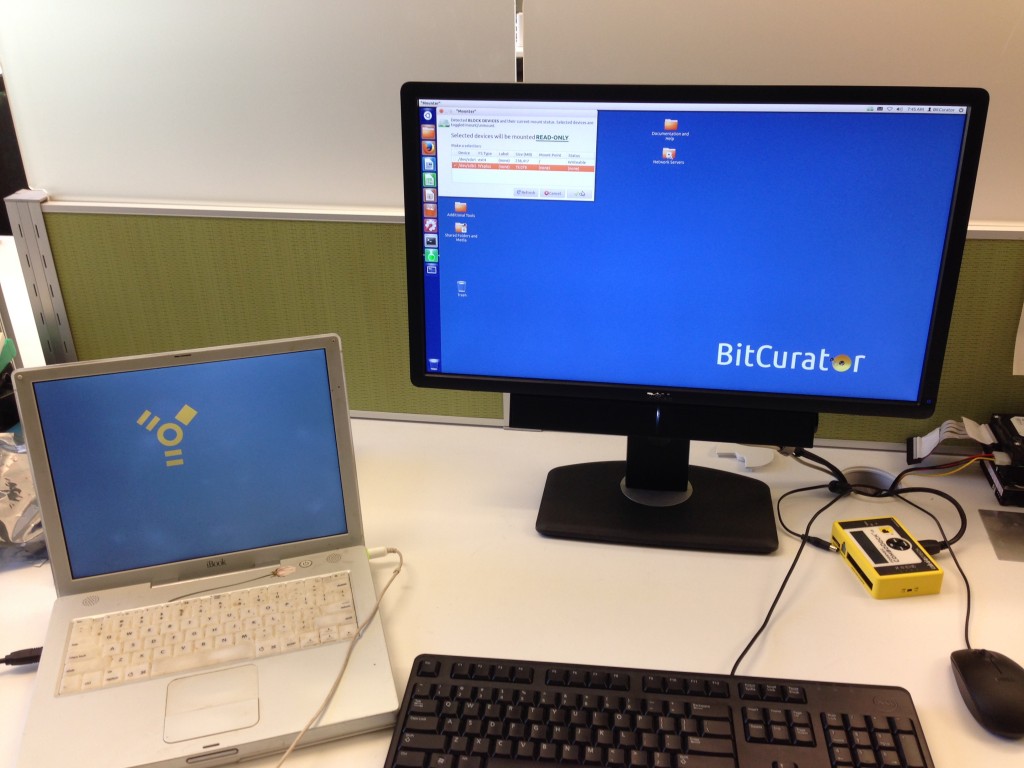
Mac in target mode connected to imaging workstation.
To create a forensics disk image, there are a variety of free and commercial programs that provide graphical interfaces for Mac and Linux, including MacOSXForensics Imager (Mac) and Guymager (Linux; note that Guymager is the imaging software BitCurator incorporates). Commercial options such as FTK Imager also exist. Almost any program that creates the image in an Encase (E01) or AFF forensic disk image format works, as these formats take a raw disk image and wrap metadata about the imaging around it. We haven’t formally evaluated the effectiveness of any programs outside the BitCurator suite, though, so you’ll want to check potential Mac forensic imaging software out yourself and explore the images they create within the BitCurator environment to make certain they captured your device correctly.
Alternatively, you can choose one of the following command line methods—but it’s of utmost importance that you use a write-blocker with these, as mis-typing could erase your device:
If you’re very knowledgeable about using the command line, you may already know how to use dd or dcfldd.
The ForensicsWiki has a detailed tutorial on “Acquiring a Mac OS System with Target Disk Mode” that uses dd and other commands to create a .dmg image, plus instructions on converting the .dmg to an Encase format.
After following these steps to make a forensic image of your laptop, you can either opt to import the forensic image into BitCurator and explore the image there, or choose to temporarily remove the hard drive in order to image it directly through BitCurator. If you choose the latter path, you’ll need to search for instructions like these that show how to open your particular model of Mac. If possible, use a guide with many photos to show you how to carefully open, remove, and replace the Mac laptop’s hard drive. I’ve found that sites dedicated to DIY fixing and making, such as iFixit and Instructables, offer good community-moderated tutorials on opening up computers.
In a future post, I’ll discuss what I found while exploring the Larsen laptop disk image using BitCurator. Send us your suggestions for other difficult-to-image use cases, and we’ll cover them in future posts!
Amanda Visconti is a MITH graduate research assistant on the BitCurator project, where she creates user-friendly technical documentation, develops and designs for the web, and researches software usability. As a Literature Ph.D. candidate, she blogs about her digital humanities work regularly at LiteratureGeek.com.
To use BitCurator, we’ll need to figure out how to connect the laptop’s hard drive to the BitCurator environment; this post will explore how you can similarly image your Mac laptop for digital forensic work.
Why is it difficult to image an internal Mac laptop drive?
You can get to work quickly with BitCurator if you’ve got a digital device ready to be connected to your computer: an external hard drive or removed internal hard drive, a floppy disk port, a USB stick, or other devices and the cables to attach them to your host machine.
With a Mac laptop, however, the device isn’t as easy to get at. If it’s a working, explorable laptop, as with Larsen’s, there’s a risk to that working status associated with temporarily physically removing the drive for imaging via a SATA cable—so we’d like to avoid opening the laptop up if possible, and find some other way of imaging the drive.
Mac in target disk mode.
Imaging the laptop hard drive by connecting one of its exterior ports (e.g. USB) seems like the way to go, but Macs are finicky about showing up as drives on other computers.
If you want to see your Mac laptop as a drive mounted on another computer (and thus be able to image it), you’ll need to set the laptop to something called Target Disk Mode:
Target Disk Mode Steps
The laptop to be imaged (e.g. our Larsen laptop) should be turned off.
Hold down the t key and turn the laptop to be imaged on.
Continue to hold down the t key until the target disk mode image appears on the screen (see photo example).
You can now attach the target disk via firewire cable to a machine with BitCurator running in a partition, and the Mac laptop should show up as a connected drive like any other connected device.
Unfortunately, target disk mode can only transfer data over a firewire; using other ports/cables such as USB will not work. This presents three problems:
Both your laptop and the machine running BitCurator must have firewire ports to allow for the firewire
If you want to use a hardware write-blocker, it will need to have both firewire input and output
This use case is Mac plus laptop-specific: that is, desktop Macs don’t use the compact unibody design of the laptop, so it’s far easier to open the case and connect the hard drive to a machine running BitCurator (thus there is no need to adopt Target Disk Mode). And non-Mac laptops will show up as image-able drives on other machines automatically, without the special needs of the Mac Target Disk Mode.
Our Choice: Imaging with BitCurator on a Partition
Imaging the Larsen Mac laptop using a firewire and PC partitioned with the BitCurator Ubuntu.
Why? We had the necessary components to let BitCurator recognize the Mac laptop as a drive: a firewire cable, a firewire port on the Larsen Mac, and a firewire port on a PC partitioned with BitCurator.
Our hardware write-blocker (WiebeTech Forensic ComboDock), used to protect devices from being written to while we’re imaging them.
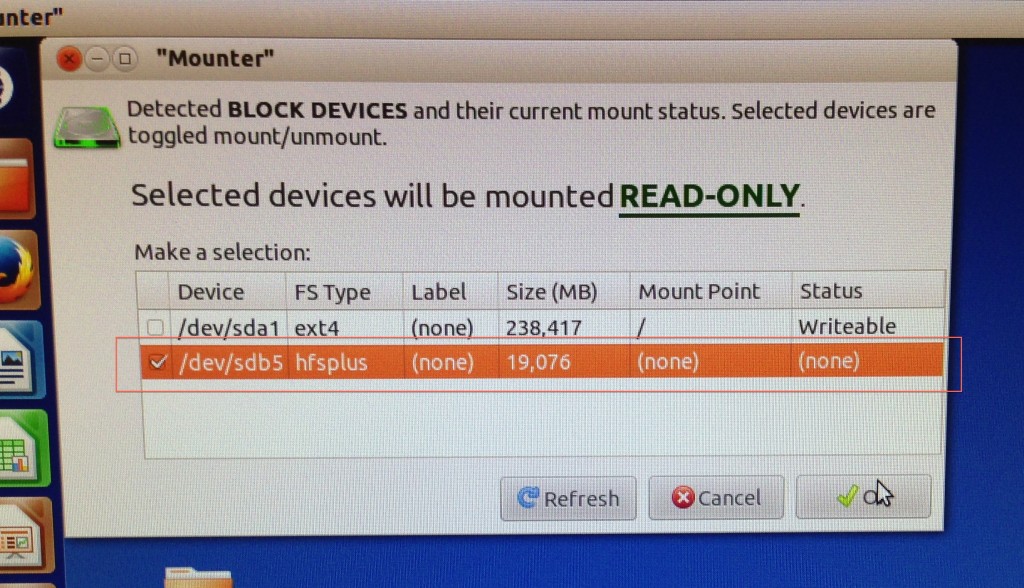
We weren’t able to use our usual hardware write-blocker, as it only takes firewire input but doesn’t output it; BitCurator incorporates a feature that can mount devices safely, however, so we were still able to protect the device from being written back to. Follow these instructions to safely mount devices in BitCurator.
The software write-blocker safely mounts the laptop as a drive.
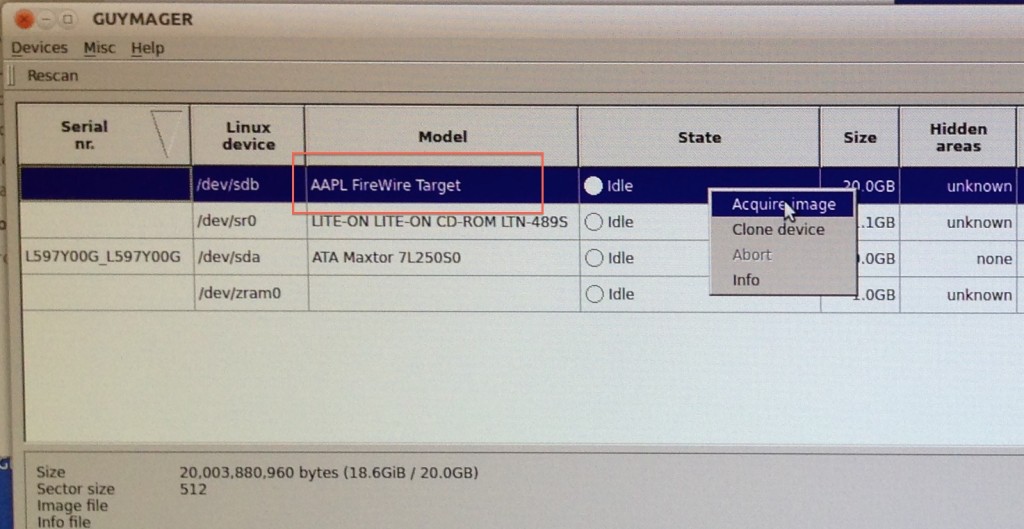
Next, we used BitCurator’s bundled Guymager software to forensically image the laptop (see these instructions or this video for steps to use Guymager yourself.) This produced a forensic image of the laptop, which we’ll be further exploring with BitCurator in a future post.
Using BitCurator’s Guymager instance to forensically image the laptop.
In another future post, I’ll discuss an alternative approach for those of you who couldn’t follow these instructions (e.g. no firewire port, no BitCurator running on a partition).
Send us your suggestions for other difficult-to-image use cases and we’ll cover them in future posts!
Amanda Visconti is a MITH graduate research assistant on the BitCurator project, where she creates user-friendly technical documentation, develops and designs for the web, and researches software usability. As a Literature Ph.D. candidate, she blogs about her digital humanities work regularly at LiteratureGeek.com.