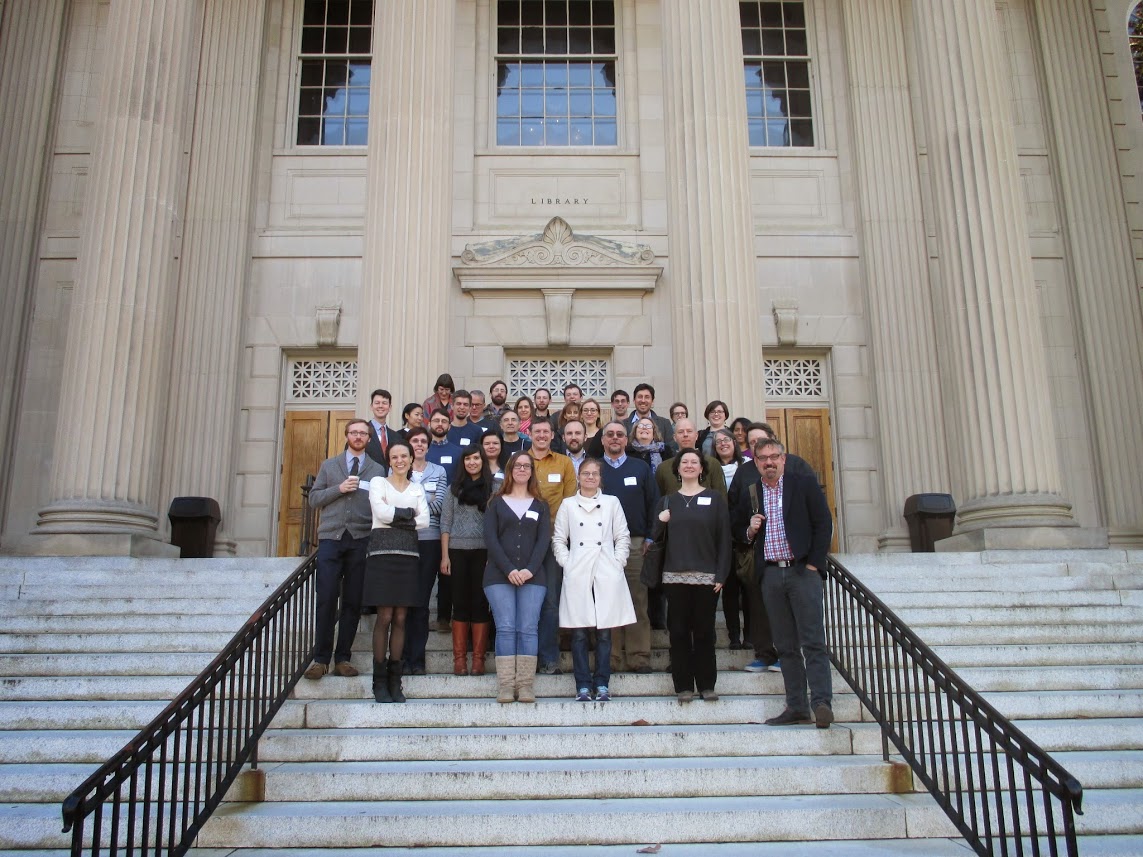
The First Annual BitCurator User Forum took place last Friday, January 9th at the Pleasants Family Assembly Room in Wilson Library on the campus of the University of North Carolina Chapel Hill. The Forum was attended by approximately forty practitioners from around the world, focused around three panel discussions. The goal of the forum was to describe best practices, discuss challenges in implementing the environment, share strategies for integrating BitCurator into institutional workflows, and to provide opportunities for collaborations on future work.
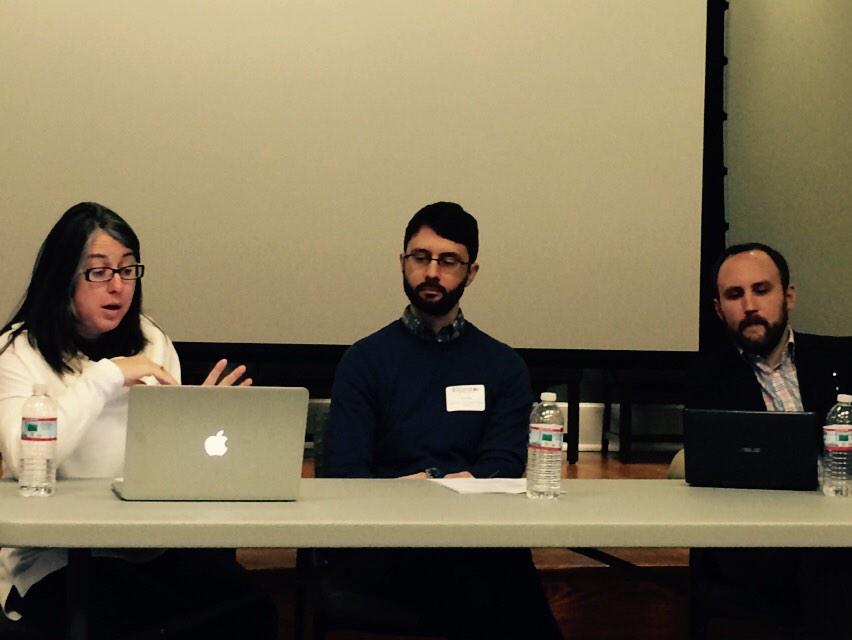
The first panel was chaired by Erika Farr, head of Digital Archives at the Manuscripts, Archives, and Rare Book Library at Emory University. She was joined by Euan Cochrane, Digital Preservation Manager at the Yale University Library and Brian Dietz, the Digital Program Librarian for Special Collections at the North Carolina State University Libraries. The session focused on options for disk image formats (particularly the Encase image format, the Advanced Forensic Format, and raw) and the criteria different institutions use to choose a format for a particular type of media. The panelists and the audience discussed the pros and cons of different formats and will begin to articulate general criteria for format selection.
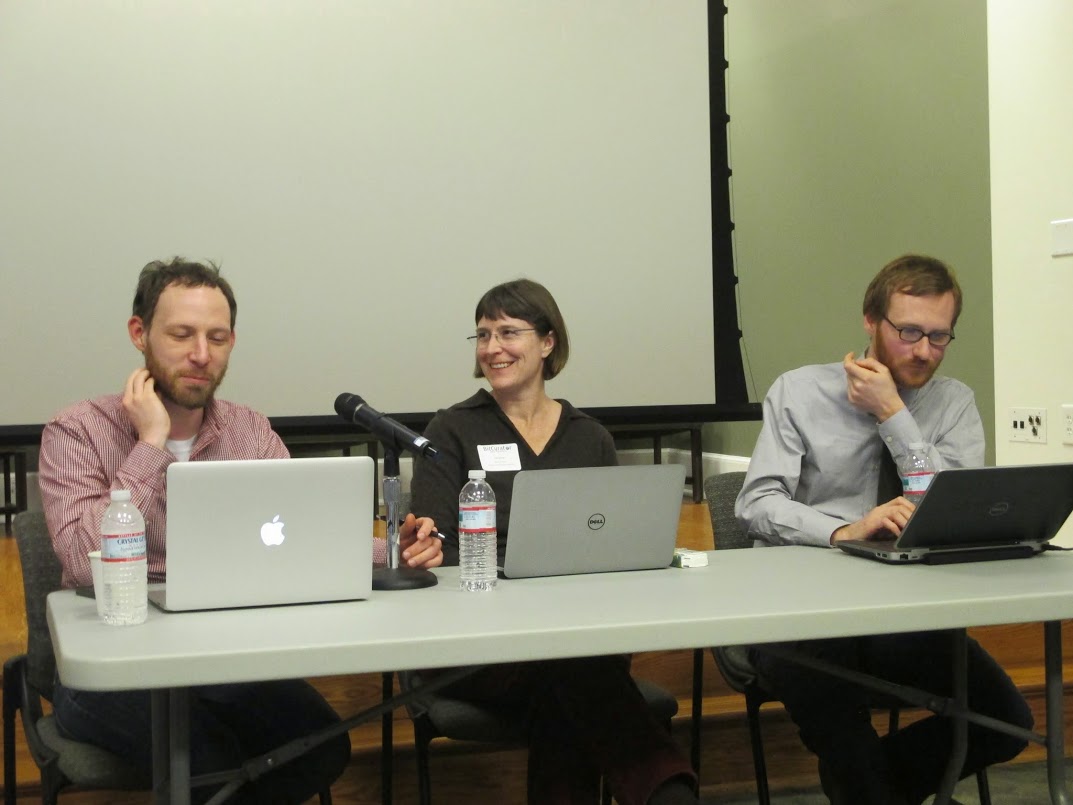
Matthew Farrell, Digital Records Archivist at Duke University, chaired the next panel on workflow exchanges. He was joined by Walker Sampson, Digital Archivist at the University of Colorado Boulder, and Kari Smith, Digital Archivist at the Massachusetts Institute of Technology Libraries. This panel focused on the use of BitCurator tools and output in each institutions’ archival workflows. Each panelist gave a quick overview of their workflow and then addressed specifically how they integrated BitCurator into their existing preservation systems, collection management systems and descriptive workflows, and their appraisal workflows. Look for an upcoming post from Walker Sampson next week describing his approach at UC Boulder.
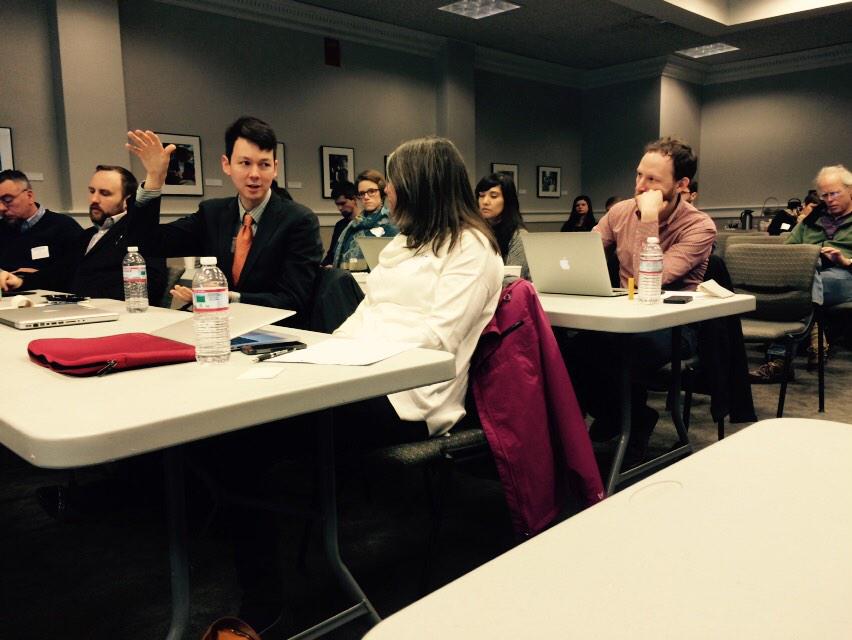
Christopher (Cal) Lee, the Frances Carroll McColl Term Professor in the School of Information and Library Science at the University of North Carolina Chapel Hill and the Principle Investigator of the BitCurator Access project, chaired the final panel on future work integrating BitCurator with other tools and environments. The other panelists were Kam Woods, Research Scientist at UNC SILS and co-Principle Investigator on the BitCurator Access project; Don Mennerich, Digital Archivist at New York University; Zach Vowell, Digital Archivist at Cal Poly, and Brad Westbrook, Program Manager at ArchivesSpace. Each panelist gave a brief presentation about current development activities they were working on. Following that, the panel held a larger group discussion with the forum about the biggest integration challenges and specific opportunities at their institutions.
The BitCurator User Forum provided a space for this emerging community to highlight issues and concerns, and to share strategies and best practices. We are very grateful to the Educopia Institute for hosting the forum, and the Andrew W. Mellon Foundation for providing funding for the event.
In the coming weeks, some of our discussion panelists will be providing guest posts about their individual presentations to the forum. Stay tuned!
Join BitCurator users from around the globe for a hands-on day focused on current use and future development of the BitCurator digital software environment. Hosted by the BitCurator Consortium (BCC), this event will be grounded in the practical, boots-on-the-ground experiences of digital archivists and curators. Come wrestle with current challenges—engage in disc image format debates, investigate emerging BitCurator integrations and workflows, and discuss the “now what” of handling your digital forensics outputs.
General Registration – $30
Student Registration – $15
BitCurator Consortium Member Registration – Free
Press Release (pdf)
Release date:
October 21, 2014 Andrew W. Mellon Foundation Grant Supports Improving Access to Born-Digital Collections for Collecting Institutions
The BitCurator Access project will develop open-source software that supports the provision of access to disk images through three exploratory approaches: (1) building tools to support web-based services, (2) enabling the export of file systems and associated metadata, (3) and the use of emulation environments. Also closely associated with these access goals is redaction. BitCurator Access will develop tools to redact files, file system metadata, and targeted bitstreams within disks or directories.
BitCurator Access builds on previous work of the BitCurator project, a three year, collaborative effort between SILS and the Maryland Institute for Technology in the Humanities (MITH) at the University of Maryland. The project developed, packaged, and documented open source digital forensics tools to allow LAMS to advance many core digital curation goals, including: creation of authentic copies of data on disks; reflection of the original order of materials; establishment of more trustworthy chains of custody; discovery and exposure of associated contextual information; and identification of sensitive information that should be filtered, redacted or masked in appropriate ways.
“Many LAMs within the US and internationally are using these tools and methods to generate disk images, extract metadata to support ongoing preservation tasks, and store the resulting data in dedicated servers or shared network spaces,” said Dr. Christopher (Cal) Lee, principal investigator of the BitCurator Access project. “However, there is currently very limited support for provision of access to the contents of the disk images or associated metadata.”
Kam Woods, Research Scientist at SILS, will be the Co-Principle Investigator and Technical Lead for the BitCurator Access project. Sunitha Misra, a recent graduate of SILS’ MSIS program, will serve as software developer. Alexandra Chassanoff, a SILS doctoral candidate, will serve as the Project Manager. An advisory group of external partners with significant relevant experience will provide guidance and expertise.
For more information about the project, please visit the main BitCurator web site at: bitcurator.net and follow @bitcurator on Twitter.
[Original post by Amanda Visconti. Minor updates in July 2018 to resolve outdated links and media.]
Last week, I wrote about how to forensically image the internal hard drive on a Mac laptop without needing to physically remove the drive. If your workspace doesn’t have the necessary tools to follow that tutorial (a firewire cable, a firewire port on the Mac you’re imaging, and a firewire port on a PC partitioned with BitCurator), we offer an alternative in this post.
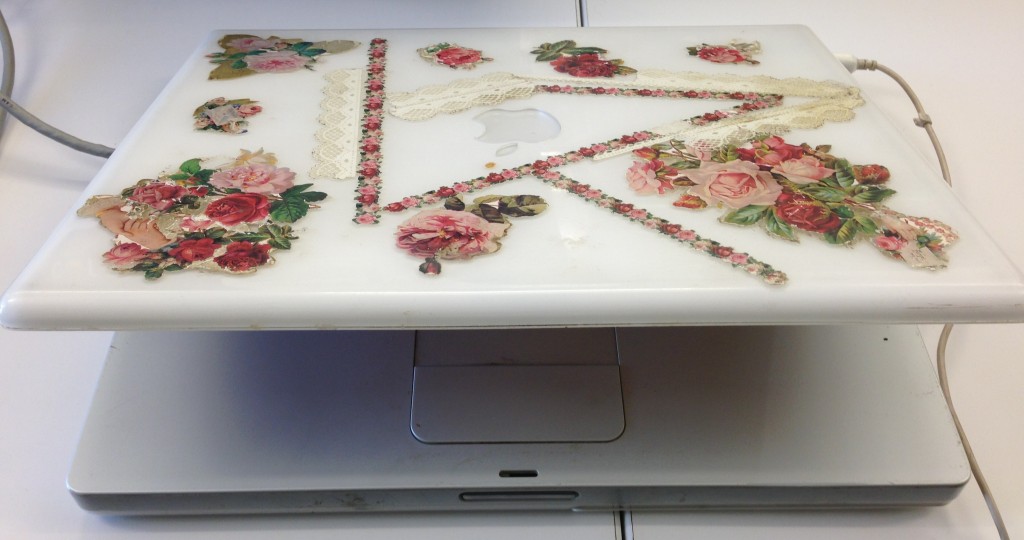
The Mac laptop we wanted to forensically image.
Other Options for Imaging Mac Laptops
We recognize that you might not have the correct devices on hand to follow the instructions in the previous post. In that case, you may want to open the laptop to temporarily remove the hard drive for forensic imaging within the BitCurator environment, which means you’ll need a cable that connects a hard drive to your imaging computer (probably a SATA cable). You can also opt to make a forensics image outside BitCurator and then import the image into BitCurator for exploration.
Note that the issue complicating this imaging process is specific to Mac laptops; Linux and Windows laptops wouldn’t require target disk mode and the trouble that causes. Target disk mode works with other Macs (perhaps obviously) and Linux machines; I wasn’t able to get a Windows machine to recognize the Mac laptop in target disk mode. I’ve read that commercial software called MacDrive (currently about $50 for use on one PC) will let you connect the a Mac in target disk mode to a PC, but this would not make the Mac drive also available in the Windows computer’s BitCurator VM; unfortunately, VirtualBox is unable to take firewire input. It’s possible you could get around this issue by using other virtualization software, but VirtualBox is the best free/open-source option.
That leaves us with using either a Mac or Linux machine to create our backup of the Mac laptop; in our example, I used a Mac to create the backups. We’ll walk you through how to first lessen the risk of tampering with a laptop’s insides by securing a forensic image outside of BitCurator.
Why Backup?
Opening up the laptop, removing the drive, and later trying to put everything back risks the laptop refusing to start or otherwise being damaged: maybe you break something, or can’t get things to fit back together. If you don’t have another way to gather a forensics disk image packaged with metadata about the imaging, though, opening the laptop up can be an acceptable risk. All computers fail eventually, and we’d rather have a good forensics disk image of the laptop now, than more years with the laptop working but no forensics image preserved. We thus recommend you forensically image the laptop’s hard drive before opening it, or choose to create a forensics image with one of the non-BitCurator options discussed below and import the image into BitCurator. Opening up the computer is only necessary if none of these forensics imaging programs are right for you, your Mac laptop doesn’t have a firewire port, or if you prefer to do all your forensic work inside the BitCurator environment. For either method, you’ll need a firewire and another Mac (with a firewire port) on which to image the laptop.
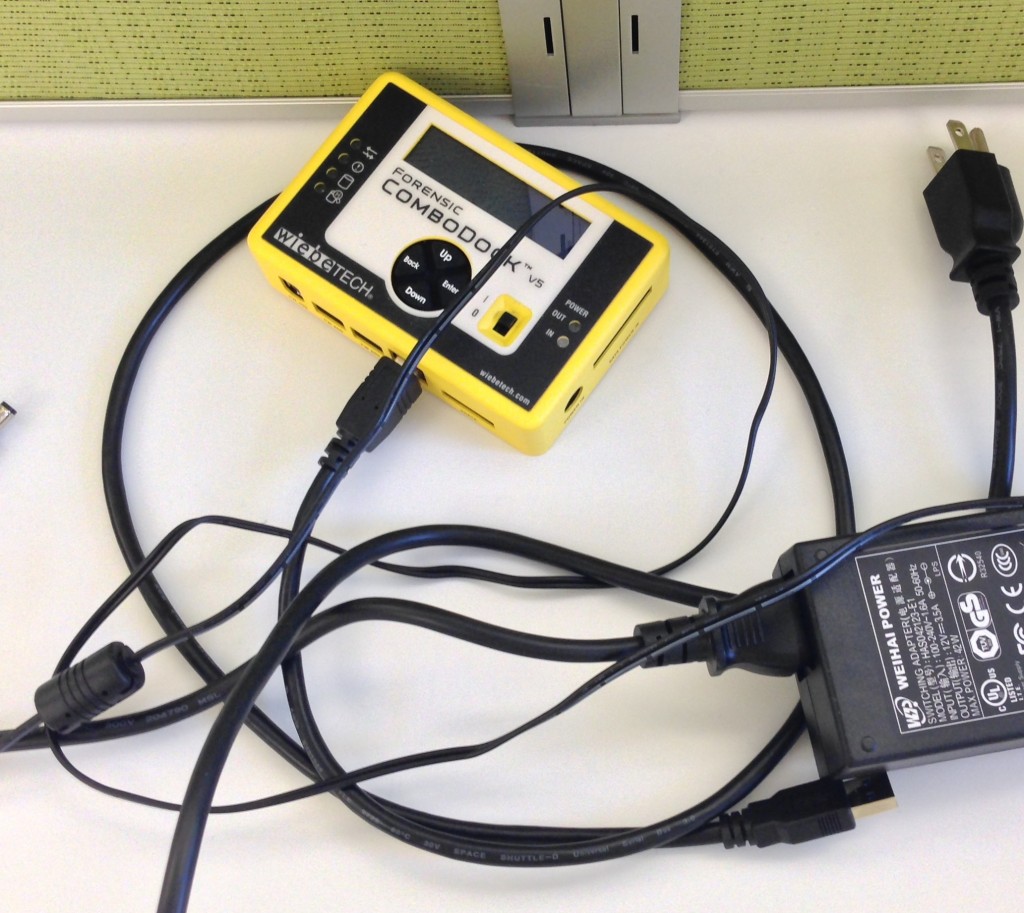
Write Blocking
First, we need to protect the laptop from having the connected machine write back to it during the imaging process. This wasn’t a major concern in our example as Larsen’s laptop has already been explored by researchers at MITH—but it’s good practice nonetheless, especially if you use a command-line imaging method, where a simple is-typing could accidentally erase your device. Our WiebeTech Forensic ComboDock works well for most write-blocking purposes, but it doesn’t have the firewire input and output needed to work with a Mac in target disk mode. Tableau T9 Firewire Forensic Bridge is a hardware option that does accept both firewire input and output, but we didn’t have one on hand. We thus used software write-blocking instead, installing Aaron Burghardt’s Disk Arbitrator to protect the laptop.
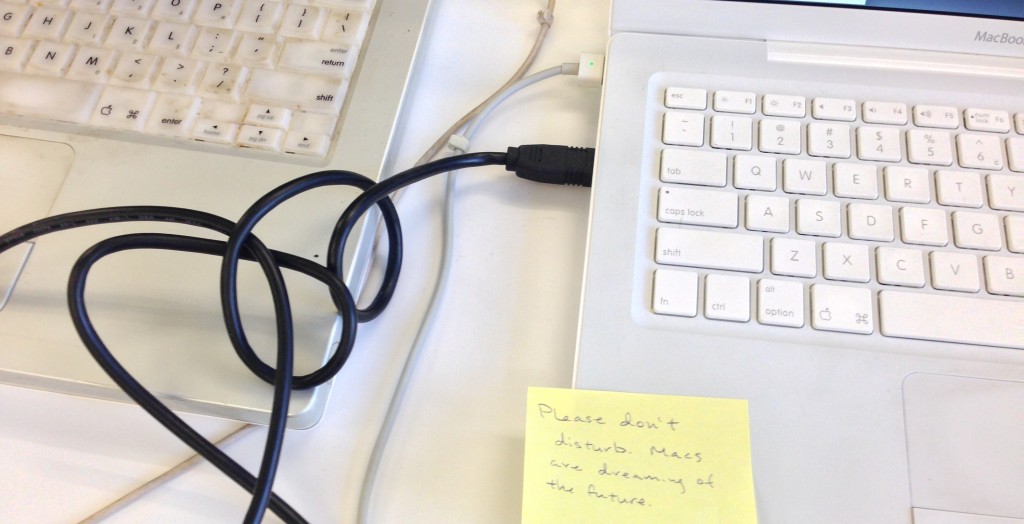
Imaging time! Leaving the computers alone during imaging.
A Forensic Disk Image
Begin by putting the Mac laptop you want to image into target disk mode:
The laptop to be imaged (e.g. our Larsen laptop) should be turned off.
Hold down the t key and turn the laptop to be imaged on.
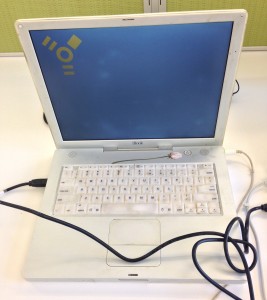
Continue to hold down the t key until the target disk mode image appears on the screen (see photo below).
Mac in target disk mode.
You can now connect your firewire cable to both the laptop to be imaged and the Mac (or Linux computer) doing the imaging.
Mac in target mode connected to imaging workstation.
To create a forensics disk image, there are a variety of free and commercial programs that provide graphical interfaces for Mac and Linux, including MacOSXForensics Imager (Mac) and Guymager (Linux; note that Guymager is the imaging software BitCurator incorporates). Commercial options such as FTK Imager also exist. Almost any program that creates the image in an Encase (E01) or AFF forensic disk image format works, as these formats take a raw disk image and wrap metadata about the imaging around it. We haven’t formally evaluated the effectiveness of any programs outside the BitCurator suite, though, so you’ll want to check potential Mac forensic imaging software out yourself and explore the images they create within the BitCurator environment to make certain they captured your device correctly.
Alternatively, you can choose one of the following command line methods—but it’s of utmost importance that you use a write-blocker with these, as mis-typing could erase your device:
If you’re very knowledgeable about using the command line, you may already know how to use dd or dcfldd.
The ForensicsWiki has a detailed tutorial on “Acquiring a Mac OS System with Target Disk Mode” that uses dd and other commands to create a .dmg image, plus instructions on converting the .dmg to an Encase format.
After following these steps to make a forensic image of your laptop, you can either opt to import the forensic image into BitCurator and explore the image there, or choose to temporarily remove the hard drive in order to image it directly through BitCurator. If you choose the latter path, you’ll need to search for instructions like these that show how to open your particular model of Mac. If possible, use a guide with many photos to show you how to carefully open, remove, and replace the Mac laptop’s hard drive. I’ve found that sites dedicated to DIY fixing and making, such as iFixit and Instructables, offer good community-moderated tutorials on opening up computers.
In a future post, I’ll discuss what I found while exploring the Larsen laptop disk image using BitCurator. Send us your suggestions for other difficult-to-image use cases, and we’ll cover them in future posts!
Amanda Visconti is a MITH graduate research assistant on the BitCurator project, where she creates user-friendly technical documentation, develops and designs for the web, and researches software usability. As a Literature Ph.D. candidate, she blogs about her digital humanities work regularly at LiteratureGeek.com.
To use BitCurator, we’ll need to figure out how to connect the laptop’s hard drive to the BitCurator environment; this post will explore how you can similarly image your Mac laptop for digital forensic work.
Why is it difficult to image an internal Mac laptop drive?
You can get to work quickly with BitCurator if you’ve got a digital device ready to be connected to your computer: an external hard drive or removed internal hard drive, a floppy disk port, a USB stick, or other devices and the cables to attach them to your host machine.
With a Mac laptop, however, the device isn’t as easy to get at. If it’s a working, explorable laptop, as with Larsen’s, there’s a risk to that working status associated with temporarily physically removing the drive for imaging via a SATA cable—so we’d like to avoid opening the laptop up if possible, and find some other way of imaging the drive.
Mac in target disk mode.
Imaging the laptop hard drive by connecting one of its exterior ports (e.g. USB) seems like the way to go, but Macs are finicky about showing up as drives on other computers.
If you want to see your Mac laptop as a drive mounted on another computer (and thus be able to image it), you’ll need to set the laptop to something called Target Disk Mode:
Target Disk Mode Steps
The laptop to be imaged (e.g. our Larsen laptop) should be turned off.
Hold down the t key and turn the laptop to be imaged on.
Continue to hold down the t key until the target disk mode image appears on the screen (see photo example).
You can now attach the target disk via firewire cable to a machine with BitCurator running in a partition, and the Mac laptop should show up as a connected drive like any other connected device.
Unfortunately, target disk mode can only transfer data over a firewire; using other ports/cables such as USB will not work. This presents three problems:
Both your laptop and the machine running BitCurator must have firewire ports to allow for the firewire
If you want to use a hardware write-blocker, it will need to have both firewire input and output
This use case is Mac plus laptop-specific: that is, desktop Macs don’t use the compact unibody design of the laptop, so it’s far easier to open the case and connect the hard drive to a machine running BitCurator (thus there is no need to adopt Target Disk Mode). And non-Mac laptops will show up as image-able drives on other machines automatically, without the special needs of the Mac Target Disk Mode.
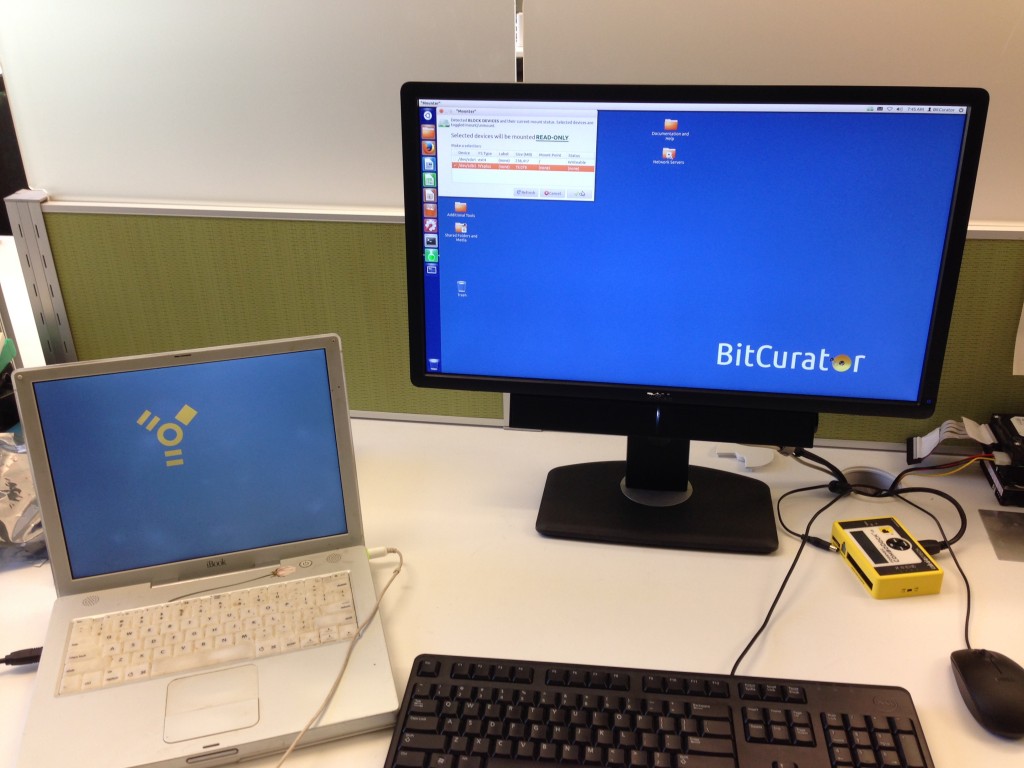
Our Choice: Imaging with BitCurator on a Partition
Imaging the Larsen Mac laptop using a firewire and PC partitioned with the BitCurator Ubuntu.
Why? We had the necessary components to let BitCurator recognize the Mac laptop as a drive: a firewire cable, a firewire port on the Larsen Mac, and a firewire port on a PC partitioned with BitCurator.
Our hardware write-blocker (WiebeTech Forensic ComboDock), used to protect devices from being written to while we’re imaging them.
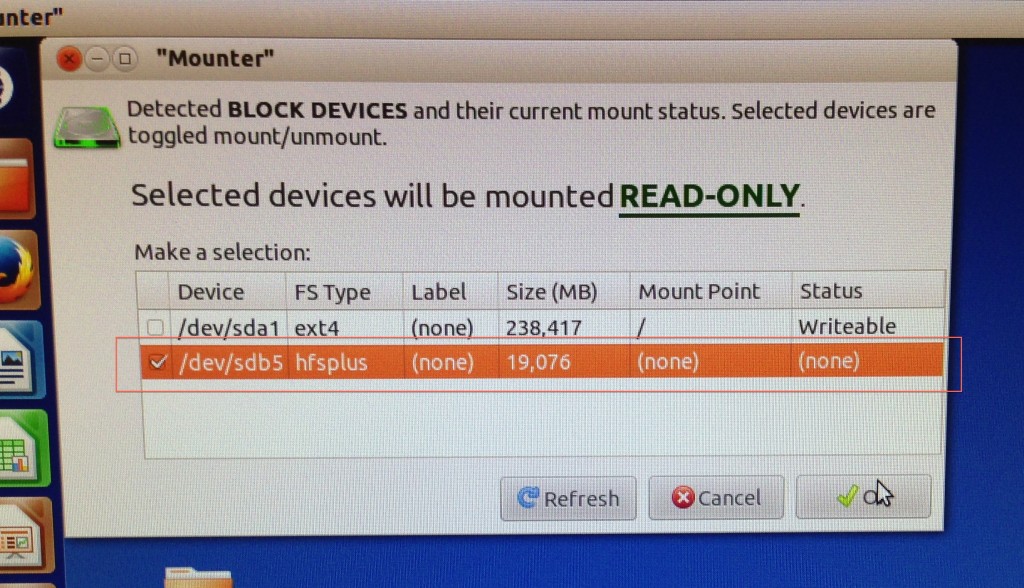
We weren’t able to use our usual hardware write-blocker, as it only takes firewire input but doesn’t output it; BitCurator incorporates a feature that can mount devices safely, however, so we were still able to protect the device from being written back to. Follow these instructions to safely mount devices in BitCurator.
The software write-blocker safely mounts the laptop as a drive.
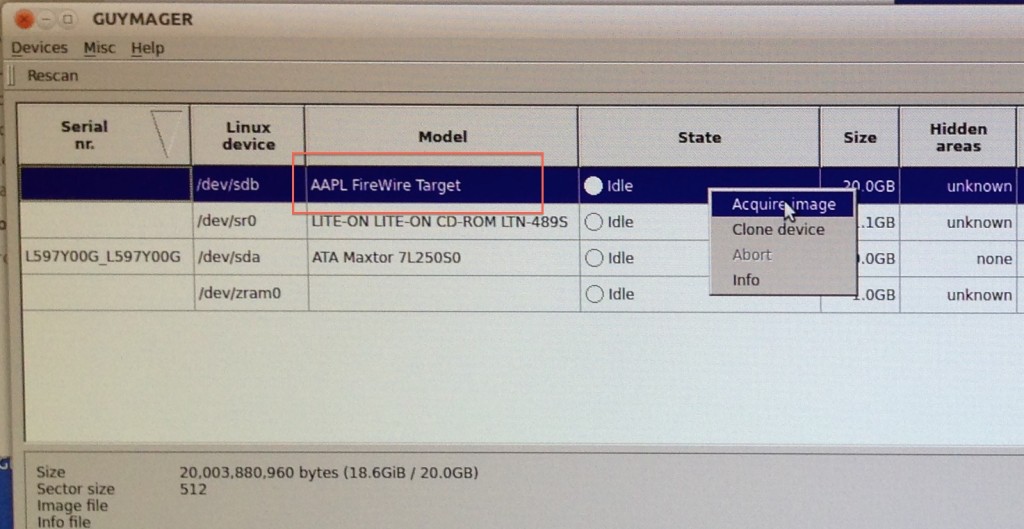
Next, we used BitCurator’s bundled Guymager software to forensically image the laptop (see these instructions or this video for steps to use Guymager yourself.) This produced a forensic image of the laptop, which we’ll be further exploring with BitCurator in a future post.
Using BitCurator’s Guymager instance to forensically image the laptop.
In another future post, I’ll discuss an alternative approach for those of you who couldn’t follow these instructions (e.g. no firewire port, no BitCurator running on a partition).
Send us your suggestions for other difficult-to-image use cases and we’ll cover them in future posts!
Amanda Visconti is a MITH graduate research assistant on the BitCurator project, where she creates user-friendly technical documentation, develops and designs for the web, and researches software usability. As a Literature Ph.D. candidate, she blogs about her digital humanities work regularly at LiteratureGeek.com.