
[Original post by Amanda Visconti. Minor updates in July 2018 to resolve outdated links and media.]
Last week, I wrote about how to forensically image the internal hard drive on a Mac laptop without needing to physically remove the drive. If your workspace doesn’t have the necessary tools to follow that tutorial (a firewire cable, a firewire port on the Mac you’re imaging, and a firewire port on a PC partitioned with BitCurator), we offer an alternative in this post.
Other Options for Imaging Mac Laptops
We recognize that you might not have the correct devices on hand to follow the instructions in the previous post. In that case, you may want to open the laptop to temporarily remove the hard drive for forensic imaging within the BitCurator environment, which means you’ll need a cable that connects a hard drive to your imaging computer (probably a SATA cable). You can also opt to make a forensics image outside BitCurator and then import the image into BitCurator for exploration.
Note that the issue complicating this imaging process is specific to Mac laptops; Linux and Windows laptops wouldn’t require target disk mode and the trouble that causes. Target disk mode works with other Macs (perhaps obviously) and Linux machines; I wasn’t able to get a Windows machine to recognize the Mac laptop in target disk mode. I’ve read that commercial software called MacDrive (currently about $50 for use on one PC) will let you connect the a Mac in target disk mode to a PC, but this would not make the Mac drive also available in the Windows computer’s BitCurator VM; unfortunately, VirtualBox is unable to take firewire input. It’s possible you could get around this issue by using other virtualization software, but VirtualBox is the best free/open-source option.
That leaves us with using either a Mac or Linux machine to create our backup of the Mac laptop; in our example, I used a Mac to create the backups. We’ll walk you through how to first lessen the risk of tampering with a laptop’s insides by securing a forensic image outside of BitCurator.
Why Backup?
Opening up the laptop, removing the drive, and later trying to put everything back risks the laptop refusing to start or otherwise being damaged: maybe you break something, or can’t get things to fit back together. If you don’t have another way to gather a forensics disk image packaged with metadata about the imaging, though, opening the laptop up can be an acceptable risk. All computers fail eventually, and we’d rather have a good forensics disk image of the laptop now, than more years with the laptop working but no forensics image preserved. We thus recommend you forensically image the laptop’s hard drive before opening it, or choose to create a forensics image with one of the non-BitCurator options discussed below and import the image into BitCurator. Opening up the computer is only necessary if none of these forensics imaging programs are right for you, your Mac laptop doesn’t have a firewire port, or if you prefer to do all your forensic work inside the BitCurator environment. For either method, you’ll need a firewire and another Mac (with a firewire port) on which to image the laptop.
Write Blocking
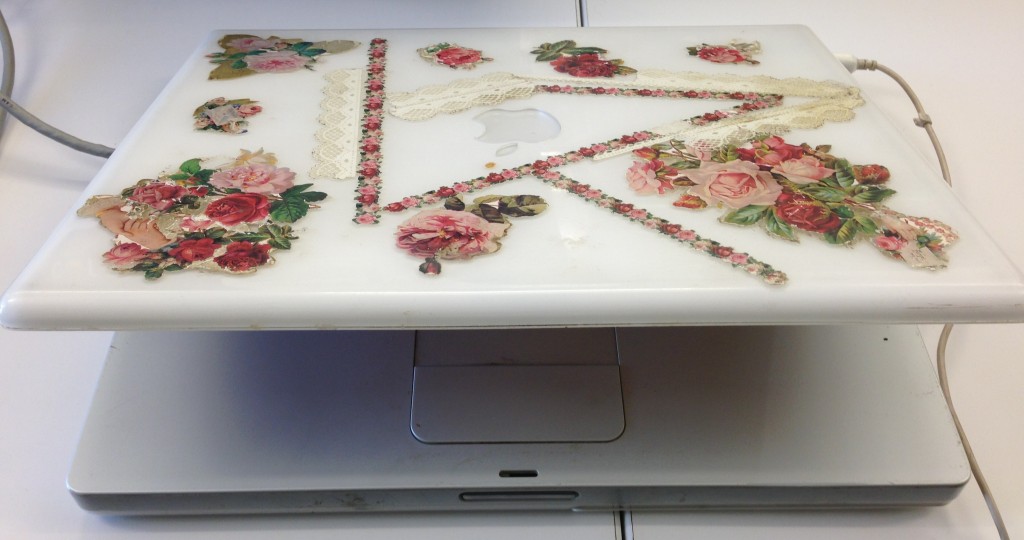
First, we need to protect the laptop from having the connected machine write back to it during the imaging process. This wasn’t a major concern in our example as Larsen’s laptop has already been explored by researchers at MITH—but it’s good practice nonetheless, especially if you use a command-line imaging method, where a simple is-typing could accidentally erase your device. Our WiebeTech Forensic ComboDock works well for most write-blocking purposes, but it doesn’t have the firewire input and output needed to work with a Mac in target disk mode. Tableau T9 Firewire Forensic Bridge is a hardware option that does accept both firewire input and output, but we didn’t have one on hand. We thus used software write-blocking instead, installing Aaron Burghardt’s Disk Arbitrator to protect the laptop.
A Forensic Disk Image
Begin by putting the Mac laptop you want to image into target disk mode:
- The laptop to be imaged (e.g. our Larsen laptop) should be turned off.
- Hold down the t key and turn the laptop to be imaged on.
- Continue to hold down the t key until the target disk mode image appears on the screen (see photo below).
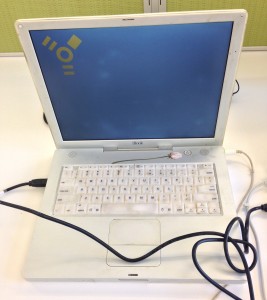
You can now connect your firewire cable to both the laptop to be imaged and the Mac (or Linux computer) doing the imaging.
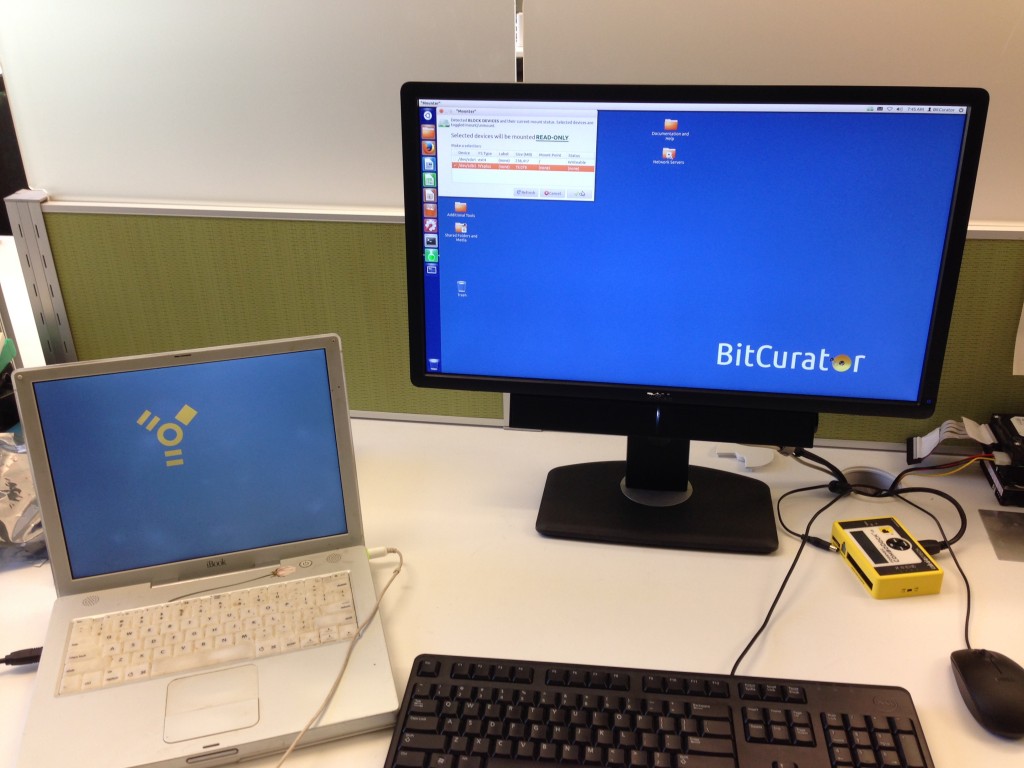
To create a forensics disk image, there are a variety of free and commercial programs that provide graphical interfaces for Mac and Linux, including MacOSXForensics Imager (Mac) and Guymager (Linux; note that Guymager is the imaging software BitCurator incorporates). Commercial options such as FTK Imager also exist. Almost any program that creates the image in an Encase (E01) or AFF forensic disk image format works, as these formats take a raw disk image and wrap metadata about the imaging around it. We haven’t formally evaluated the effectiveness of any programs outside the BitCurator suite, though, so you’ll want to check potential Mac forensic imaging software out yourself and explore the images they create within the BitCurator environment to make certain they captured your device correctly.
Alternatively, you can choose one of the following command line methods—but it’s of utmost importance that you use a write-blocker with these, as mis-typing could erase your device:
- If you’re very knowledgeable about using the command line, you may already know how to use dd or dcfldd.
- The ForensicsWiki has a detailed tutorial on “Acquiring a Mac OS System with Target Disk Mode” that uses dd and other commands to create a .dmg image, plus instructions on converting the .dmg to an Encase format.
- “Macintosh Forensics: A Guide for the Forensically Sound Examination of a Macintosh Computer” by Ryan Kubasiak offers alternative instructions for using dd (use the hyperlinked table of contents to jump to the “Imaging a Target Macintosh” section starting on page 25).
Opening the Laptop to Remove the Hard Drive
After following these steps to make a forensic image of your laptop, you can either opt to import the forensic image into BitCurator and explore the image there, or choose to temporarily remove the hard drive in order to image it directly through BitCurator. If you choose the latter path, you’ll need to search for instructions like these that show how to open your particular model of Mac. If possible, use a guide with many photos to show you how to carefully open, remove, and replace the Mac laptop’s hard drive. I’ve found that sites dedicated to DIY fixing and making, such as iFixit and Instructables, offer good community-moderated tutorials on opening up computers.
In a future post, I’ll discuss what I found while exploring the Larsen laptop disk image using BitCurator. Send us your suggestions for other difficult-to-image use cases, and we’ll cover them in future posts!
Amanda Visconti is a MITH graduate research assistant on the BitCurator project, where she creates user-friendly technical documentation, develops and designs for the web, and researches software usability. As a Literature Ph.D. candidate, she blogs about her digital humanities work regularly at LiteratureGeek.com.